Covered Material
Types of landscape lighting fixtures
Landscape Lighting Techniques & Effects
Landscape Lighting Design
Landscape Lighting Installation
Types of Fixtures
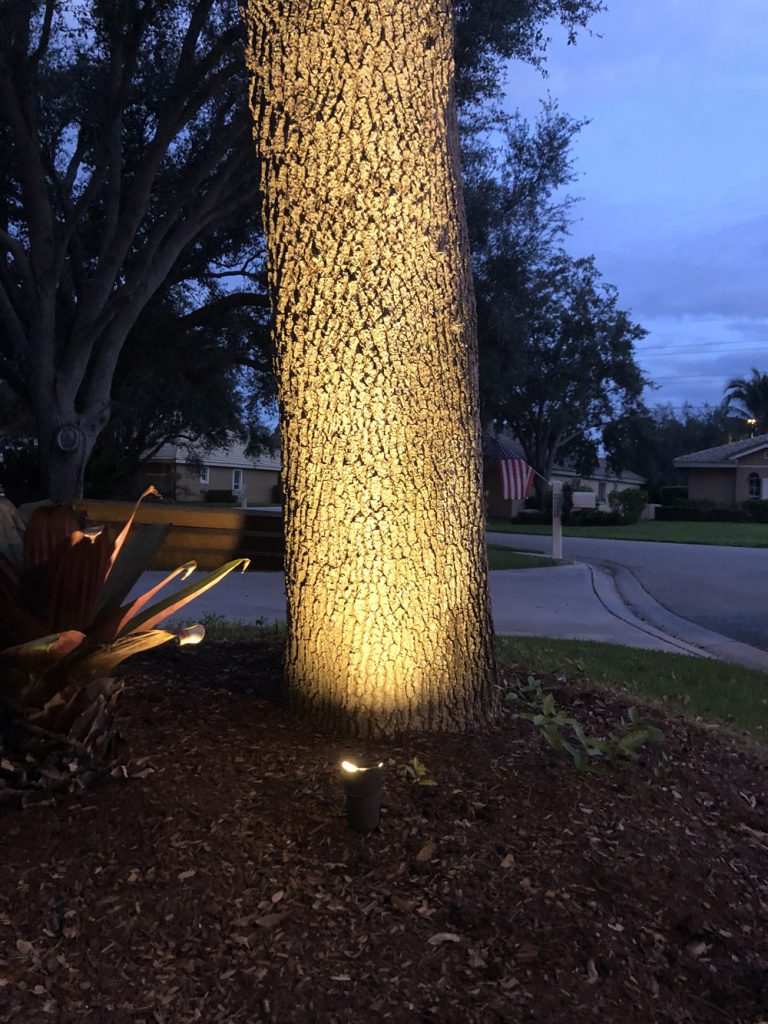
Up-lights
Up-lights are directional lights often installed to illuminate vertical exterior features of a home including palms, trees, and architectural columns. These light fixtures are a great way to highlight garden features and your favorite plants. Installing up-lights also contributes to adding depth to your outdoor spaces while adding ambient light for safety and security during dusk hours of the night.
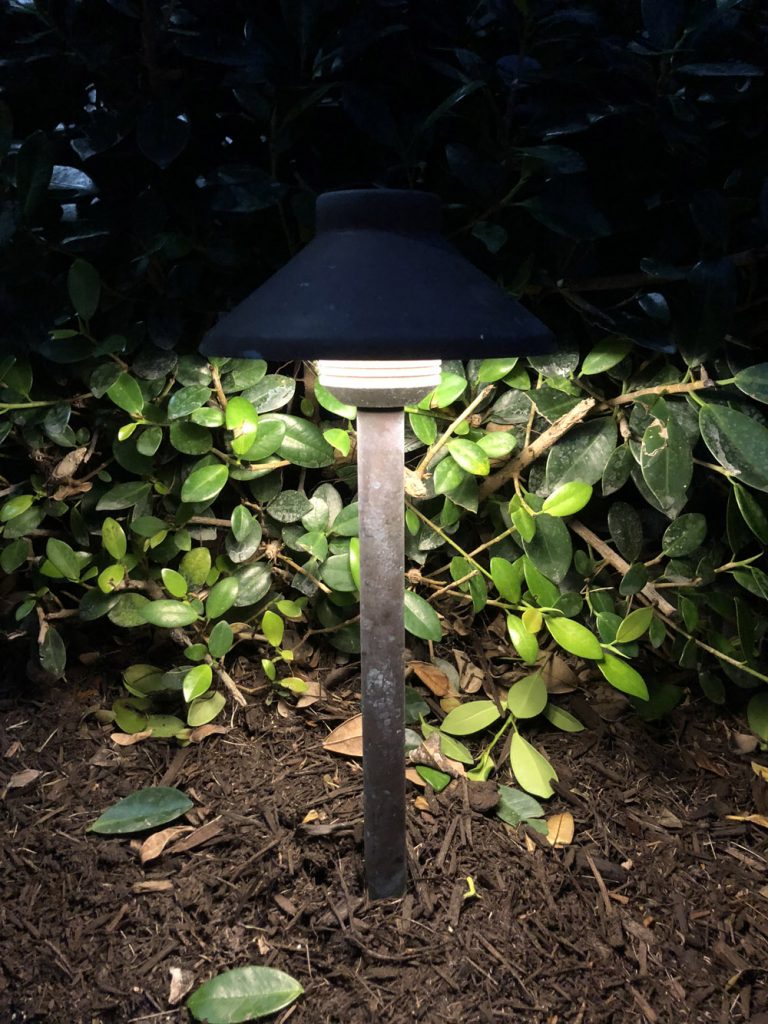
Path Lights
Path lights are typically used to illuminate areas of heavy foot traffic, however in recent years have been used to highlight decorative landscape beds, low profile hardscapes, and water features. Unlike many other landscape lighting features, path lights are typically installed in high traffic areas making it paramount that they are aesthetically pleasing and highly durable.
Floodlights
Floodlights are typically used to vertically illuminate home exteriors. Floodlights have a wider angle in regards to light emission than the up-lights, making them a great option to add substantial exterior lighting to your home.
Well Lights
Well Lights are a lighting fixture that’s body is installed predominantly below ground. Having its flush profile with hardscapes and turf allow it to be a great lighting option to incorporate in places where foot or machine traffic may pass over the light. Well lights low profile also gives the lighting feature the ability to illuminate starting from the base of its subject.
Deck and Step lights
Deck and step lights work to illuminate the transitional spaces in your home where the exterior and interiors collide. These lights typically highlight decks, stairs, and their ornate ballast. Having these lights installed are a must in regards to safety around these transitional areas.
Landscape lighting; Techniques & Effects
Accent/Up-lighting
This landscape lighting effect is when you take an up-lighting fixture and aim its narrow intense beam vertically to highlight focal points on the exterior of your home. This lighting effect allows you to choose individual features you would like to illuminate without large amounts of light pollution meeting other features of your home.
Grazing
Grazing is when you position a lighting fixture typically a well or flood light relatively close to a surface to highlight dramatic textures on landscapes, hardscapes or exterior walls. This is a great technique for any upgraded features of your home for example if you upgraded your front elevation from stucco to a stone facade this would be a great place for “grazing”.
Shadowing
Shadowing is a lighting technique where you position a light fixture in a relative distance from its subject so that the subjects shade cast on a vertical surface. This can be a great way to add depth to a landscape unless you are working with a detailed wall or facade in which case this technique could give the home a busy unorganized look.
Silhouetting
When you conceal lights behind and below a tree or bush, you achieve that same wondrous effect as seeing it on a ridge silhouetted against the sky at dusk.
Aquatic lighting
Water lighting is a very complicated lighting technique that when used properly can add a dramatic effect to any water feature. This technique is typically done by using an assortment of light fixtures in and around the water feature. It is important to remember that water will dilute the light’s intensity so plan on using 30%-50% more lumens.
Downlighting
Down-lighting is a lighting technique that incorporates a downward illumination over an area. To illuminate large areas it is best to use a flood light at high heights. If the goal is to illuminate ground-cover and walkways a path light fixture would work best.
Steps to lighting design
Landscape lighting design
Creating a great outdoor lighting design can be a daunting task if you go about it unprepared so we laid out a design plan to help you get started on your outdoor design.
Step 1
Creating a budget.
It is paramount that before starting to design a lighting package for your home that you create a budget for this project. During the budgeting process make sure to educate yourself on the cost of lighting fixtures, wire, transformers, LED bulbs & necessary tools. Having all these numbers together will help you execute a lighting design that you love and can afford.
Step 2
Identifying your objectives
Before your break out the pencil and paper and start walking around your home, this is a great time to identify your objectives. Typical lighting design objectives include safety, security, usability, and aesthetics.
Here are examples of each
Safety: Incorporating light fixtures anywhere there is a transition or change of elevation.
Security: Adding light fixtures to ward off potential theft
Usability (Using your home to the fullest extent): Adding light fixtures in key entertainment areas of your home to open up more exterior space and aid in overall safety.
Aesthetics: Incorporating up-lighting to highlight dramatic feature in your landscape such as water features, palms, trellis’s etc.
Step 3
Combine
The third and final step in the lighting design process is to take your budget, design objectives and perceived strength, weaknesses, opportunity and threats of your property and meld them together to come up with a design that ensures optimum use of your home and budget.
As you bring your design from the early preliminary stages of careful site analysis to a conceptual design either on paper or any CAD software it is important that you call out the quantity of material you will need to finish your project. *Note: when measuring distances needed for your wire, be sure to add an additional 10-15% to your final lengths, this will factor in lost wire due to light connections and unforeseen problems in the field.
Installing your landscape lighting system
Now that you have finished your design it’s time to install your new landscape lighting fixtures.
Step 1
Light Placement- We start the installation process of by placing all lighting fixtures as outlined on the lighting plan. When placing the lights, start out with hammering the stakes that hold the individual lights into the ground. Try to use larger stakes 4”-6” in length. Using larger stakes will make the lights sturdier and less likely to fall or break over time. Before tightening the light fixture to the stake ensure that all LED bulbs are inserted into the fixture.
Step 2
Laying out the wire- Run lighting wire starting from the transformer through to each light. Make sure to leave a loop in the wire at each individual fixture, this will give you additional wire needed to splice and connect all fixtures.
Step 3
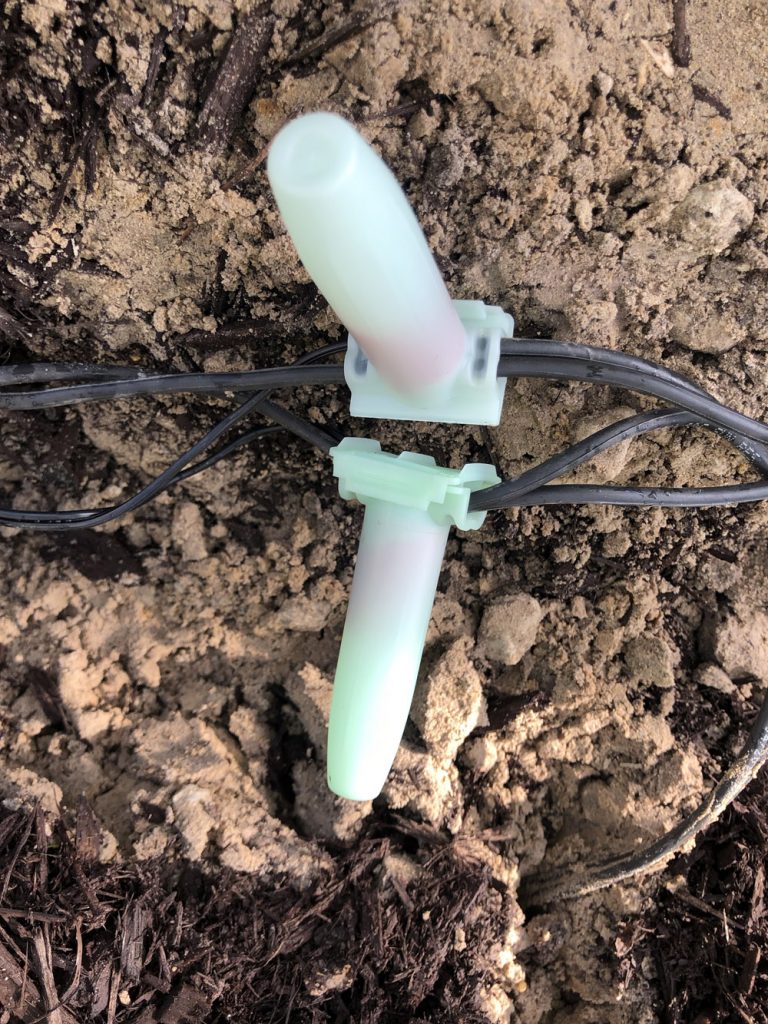
Wire Connections- At the location of each fixture cut the wire at the loop then proceed to strip roughly 1” of insulation off of the wire ends. After stripping the wire connect your lights to your wire by twisting wires together clockwise and adding a wire nut. *Note: Make sure that one of the connections is leading back to the transformer and the other is leading to the next light in the sequence. Before you bury the light connections make sure to cover wire nuts with a watertight connector. Wire connections are a critical step in the installation process, so make sure to use high-quality watertight connections.
Step 4
Mounting & connecting the transformer- Before mounting your transformer connect the low voltage landscape wire to the terminals typically found on the bottom of the transformer. Next, you want to mount your transformer adjacent to an exterior outlet. After mounting you may plug in your transformer and walk around the home making sure all fixtures are working properly.
Step 5
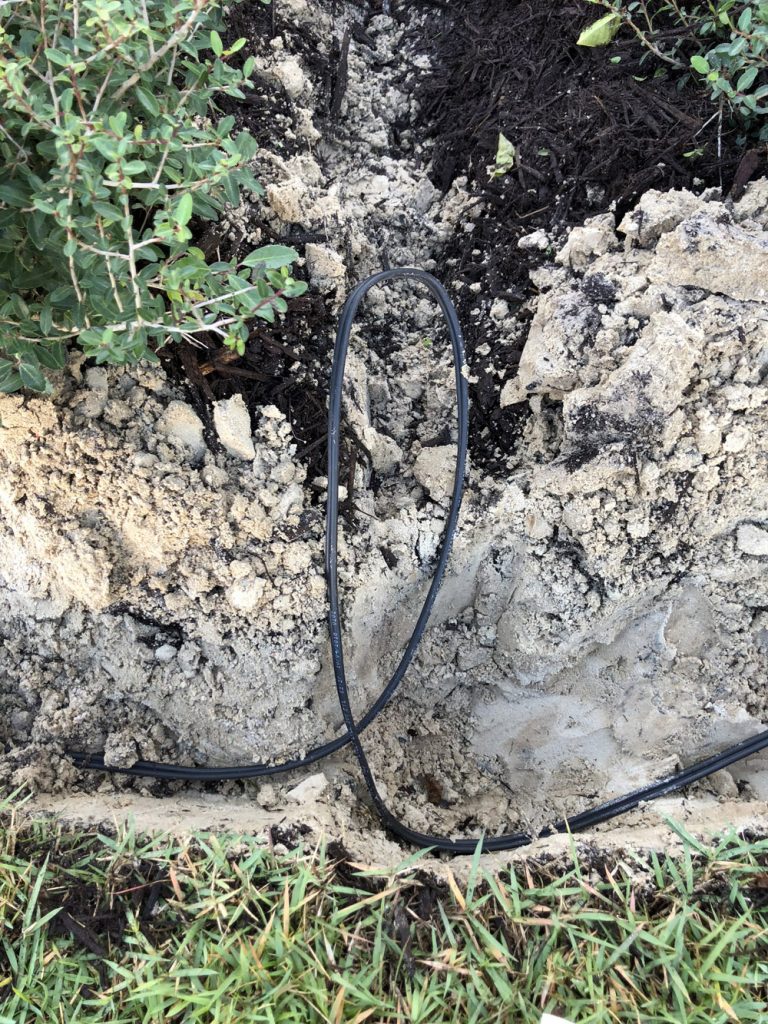
Burying the wire- Once you have checked that all lights are working you can start to bury the wire. You want to bury it at least 6” into the ground to ensure that the wire is not exposed over time. A great way to do this is to insert a long square shovel into the ground with a forward and back motion. Once you have reached the desired depth lay the wire into the trough and cover with any excess dirt.
Step 6
Readjust at night- The last step in the installation process is to walk around your finished design at night making sure to adjust all fixtures to properly illuminate their subjects. Also, it is a great investment to acquire a lighting timer and sensor that will turn off your lights automatically after a certain amount of time.